Immediately upon acquiring a document (document, image, or other type of file), you specify a document type and description for categorization and easy recognition in Document Center. Afterwards, you can change a document's date, type, description, and note if the document has not been signed.
Note: Editing document information requires the "Document Center, Edit Document Info" security right.
To edit document information
In Document Center, do one of the following:
Select
a document in the document
tree, and then click the Document
Information button ![]() on
the Document
toolbar.
on
the Document
toolbar.
Select a document in the document tree, expand the Edit menu, and then click Document Information.
Right-click a document in the document tree, and then click Edit Document Information.
If applicable, do one of the following:
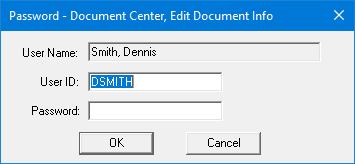
If the Password - Document Center, Edit Document Info dialog box appears, user verification has been assigned to the "Document Center, Edit Document Info" task. Do one of the following:
If your user account has been granted the "Document Center, Edit Document Info" security right, enter your credentials in the User ID and Password boxes, and then click OK.
If your user account has not been granted the "Document Center, Edit Document Info" security right, have a user with permission temporarily override this restriction so you can edit the document information this one time. The overriding user enters his or her credentials in the User ID and Password boxes and then clicks OK.

If a message appears, informing you that you do not have rights to this operation, your user account has not been granted the "Document Center, Edit Document Info" security right. To have a user with permission temporarily override this restriction so you can edit the document information this one time, do the following:
On the message, click Yes.

In the Password - Document Center, Edit Document Info dialog box, the overriding user enters his or her credentials in the User ID and Password boxes and then clicks OK.

The Document Information dialog box appears.

Note: To view the signatures that are associated with the document, click Document Signatures. This button is available only if the document has one or more electronic signatures.

Under Document Errors, do one of the following to "audit" the document (specify whether there are errors or not):
Select the No Errors checkbox.
Note: With this checkbox selected, the other checkboxes become unavailable.
Select the checkbox of each applicable error type (Poor Scan, Incorrect Location, Incorrect Record, and any user-defined error type).
Note: With any of these checkboxes selected, the No Errors checkbox becomes unavailable.
If a document type template was used to assign the corresponding Document Type and Description to the document, that template is selected in the Document Type Template list. To quickly assign a different Document Type and Description to the document, select that correct template from the Document Type Template list.
Note: If necessary, you can change the type and description after selecting a template.
Change the following options as needed:
Reference Date - This date is displayed for this document in the document tree and when it is printed. To change the date, do one of the following:
To enter the correct month, day, and/or year in the box (which uses a m/d/yyyy format), do any of the following as needed:
To change the month, click the first date segment to select the number, and then enter the number (from 1-12) of the correct month.
To change the day, click the second date segment to select the number, and then enter the correct day of the month.
To change the year, click the third date segment to select the number, and then enter the correct 4-digit year.
To use a date selector to select the correct date, click the downward-pointing arrow to view a calendar, navigate to the correct year and month, and then click the correct day.

Document Type - The document type that you want to assign to the document. If you did not select a template, or if you want to change the selection, select the applicable document type.
Description - The description that you want to use as the name for this document in the document tree and as the file name for this document when it is exported or attached to an email message. If you did not select a template, or if you want to change the text, enter a description (up to 40 characters in length) for the document.
Note - Enter a note (up to 1,000 characters in length) regarding the document. The note text is appended automatically to the text of an email message with this document attached, and you can view the note when previewing this document.
Note: To
check the spelling of the note text, click the Check
Spelling button ![]() (this button is available only if a certain preference
setting is enabled).
(this button is available only if a certain preference
setting is enabled).
Click OK.